How to Tap a Keg (and Avoid a Beer Shower)

Kegs are great for party guests and hosts alike: The host gets to sit back, while the guests serve themselves brewski after brewski all night long. But for making a party so easy, it’s ironic how tough it can be to tap a keg. If you don’t want to end up wearing all the beer (or on our list of epic beer keg fails), you should study up on proper keg technique before you ever lay hands on a tap. Here’s how to tap that crazy pressurized, but totally manageable keg. You got this, and we got you.

Step 1: Get the Right Tap
There are a handful of coupler systems that go by different letter codes, covering both American and European models, so you should first consult a handy list (like this one) to find the correct model of tap before you head to the store, or simply ask a clerk before you purchase the keg to make sure you’ve got the right equipment.
Step 2: Chill the Keg
Upon arriving home with your shiny new keg, you’re probably pretty antsy to tap that sucker, but patience is key. Pop into a keg straight from the store and you’ll just find sudsy warm beer inside. Let the keg settle in an ice bucket for two hours before tapping it. If the keg is significantly taller than the bucket, wrap the keg in a garbage bag, then fill the bag with ice so you can fully cover everything. Oh, and don’t forget to ice your tap and beer line too.
Step 3: Remove the Cover From the Valve
It might be plastic or cardboard, but either way just rip the cover off.

Step 4: Make Sure Your Tap Is Disengaged
Taps are either outfitted with a single handle or flanges around the sides. Disengage whatever mechanism your tap is outfitted with. This is incredibly crucial. Failing to do so will result in a beer fountain bathing you in sticky, hoppy shame. Don’t end up on YouTube taking an embarrassing beer shower.

Step 5: Line up the Tap
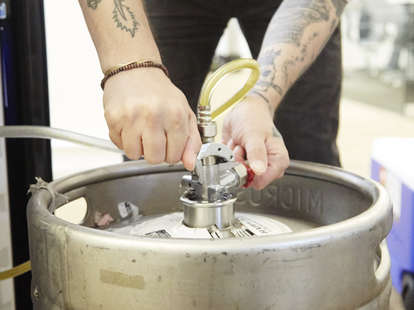
Inside the valve on the top of the keg, you’ll see little barbs jutting out. These are the coupler lugs. Place the tap above the keg valve, lining up the lugs with the openings inside the tap.

Step 6: Screw in the Tap
Once everything is lined up, simply push down on the tap as you rotate it clockwise into the valve. The tap should turn about 90 degrees and then stop naturally.

Step 7: Engage the Tap
Pull down the handle or flanges to engage the tap. Assuming you did everything right up to this point, you’ve officially tapped a keg. Congratulations!
Step 8: Don’t Pump
Don’t go yanking on the pump as soon as you’ve engaged the tap. There should be enough pressure in the keg that you needn’t pump for the first round of drinks. Consider it a gift from the keg gods.
Step 9: Test Pour
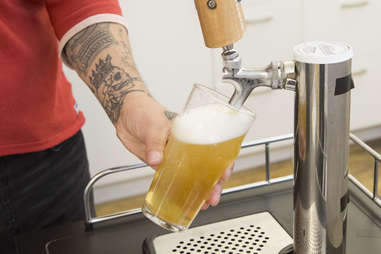
Pour a few glasses or fill a pitcher to make sure no bubbles are escaping around the valve. If you do see foam or liquid escaping from the valve, disengage the tap and try again.

Step 10: Ditch the Foam
Even if you’ve correctly tapped the keg, the first few steins you pour will fill with foam. Don’t worry. Just ditch this first wave of foam and plow through to the beer goodness on the other side.

Step 11: Get the Kegger Started
Once the foam clears and the beer is flowing properly, fill a glass and toast your success. And remember: The party doesn’t stop until the keg runs dry.